World Making the perfect Spidey suit - continued

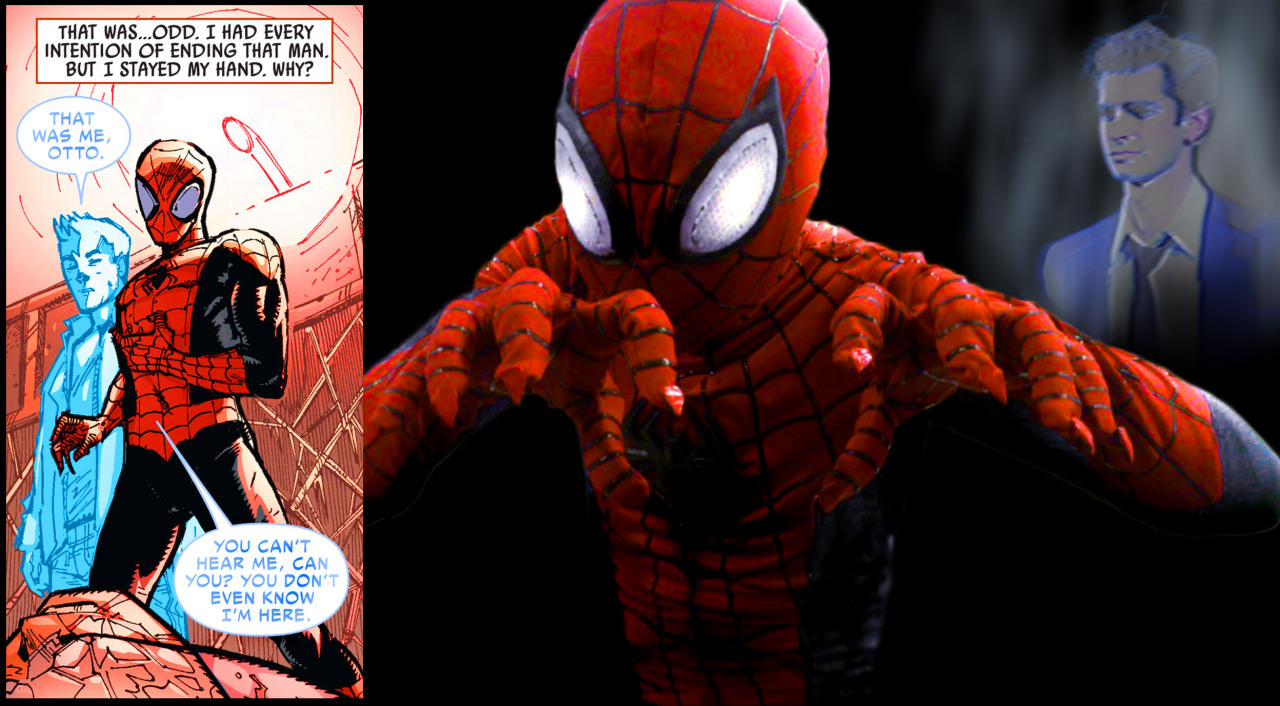
Doc o...(cough cough) i mean superior spider man suit anyone?

tumblr_mf7kw51JTZ1qjt19no3_1280.jpg


My site: http://spiderdangeromo.tumblr.com

:yay:
 
That's me, sirs. Me and my friends made the Superior Spidey suit above. We were just on the process of making a classic Spidey suit, then the Superior Spider-Man with his new look was announced, so we had to rush and modify it. Thus the colors were of the classic one. :yay:

tumblr_mgrf3v4a361qjt19no1_1280.jpg
 
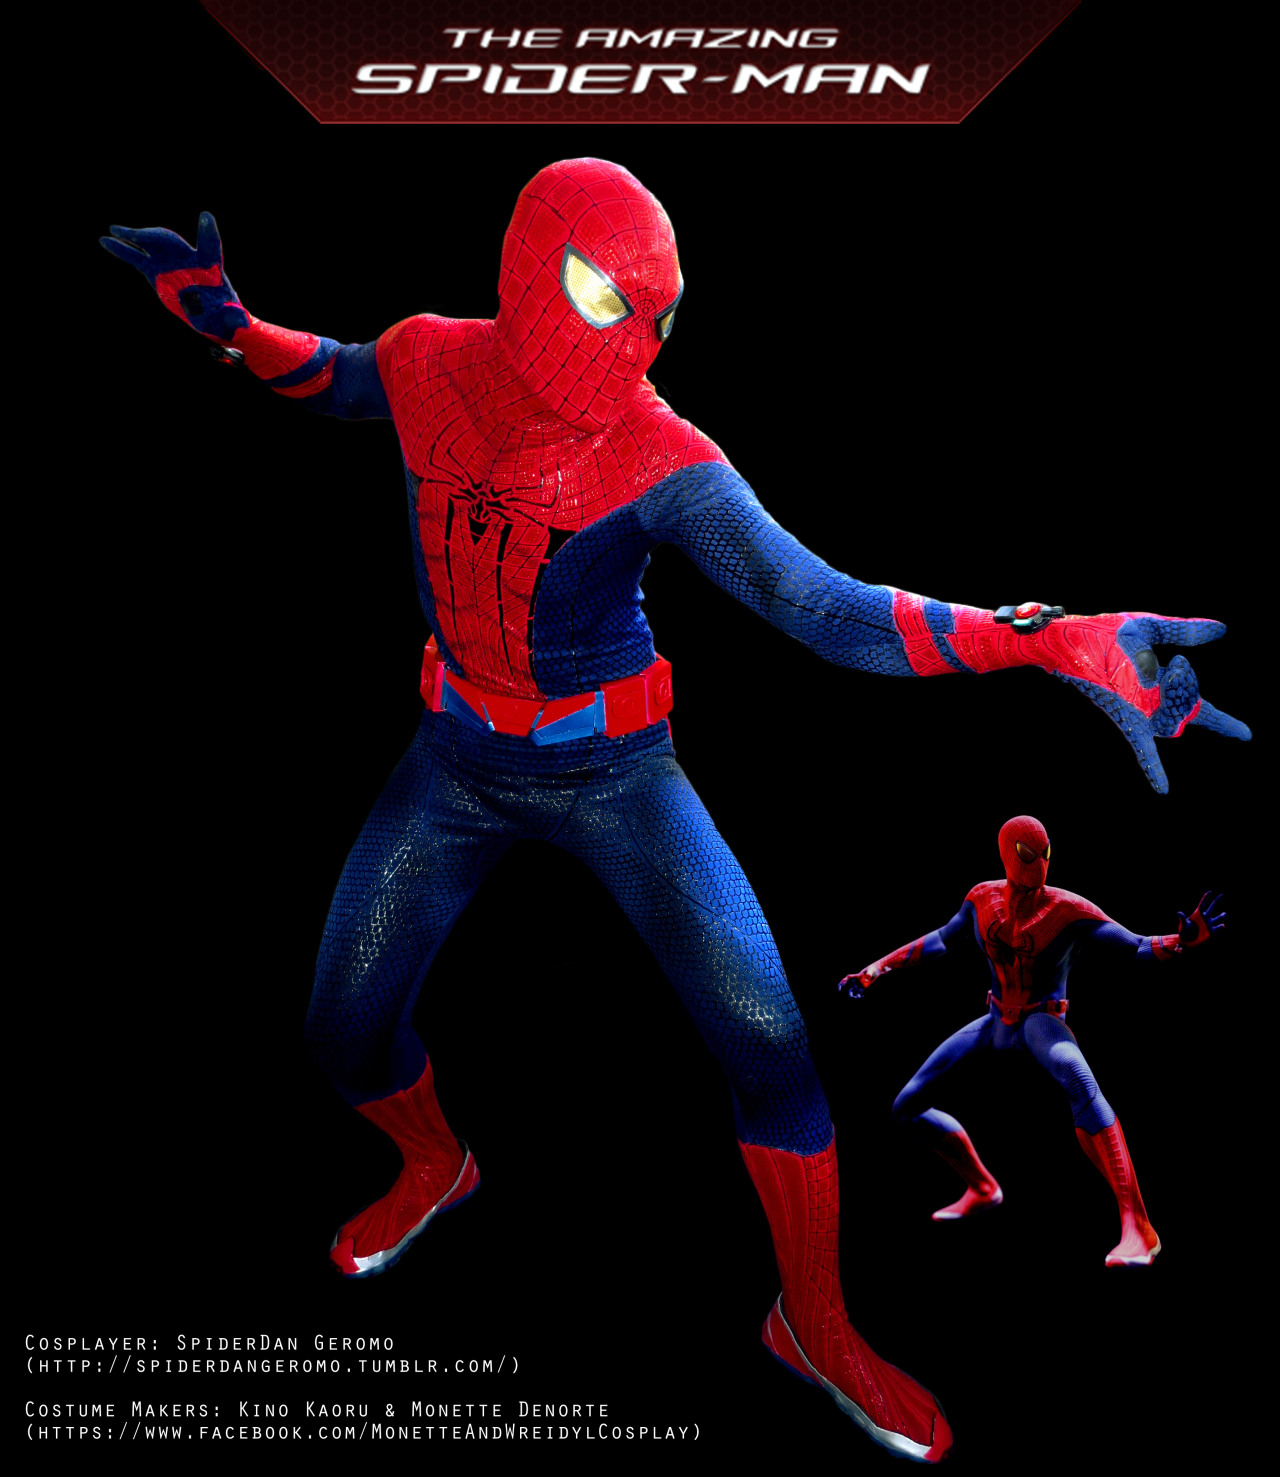
Here's the shoot from my latest suit. Working on a new video as well, coming soon!

full1.jpg

full2.jpg

full3.jpg

full4.jpg

full5.jpg

full6.jpg
 
Quick question, is this forum just about fabric, or a suit that would GIVE you powers? No? Well then I'll probably make my own thread. I'll post the link if anyone's interested.
 
it's just about costume builds,not about a "power giving" suit,lol.
 
wow, i posted that 6 months ago. if anyone wondered what meant, i was building a RLSH suit that would emulate spider-man's powers in real life. was gonna sell it to a RLSH group i know about, but the guy who was interested became inactive, so im fixing it up and then making a new suit for noir, then prowler. already finished new goblin. I REALLY hope that police never search my house and find these dangerous super suits. ESPECIALLY my prowler and goblin. how id explain all those weapons ill never know...:waa:
 
I meant what do you want me to pm? if you want pics and vids of the suits, im afraid i won't do that. i have my own reasons. however, if you would like shots of individual parts and diagrams, i would be happy to message you them!
 
it's about a rlsh iknow from my city. too weird & long to explain. anyway,shots of individual parts & diagrams of your "suits",even though that (no offense) not convinced about your "suits".
 
it's about a rlsh iknow from my city. too weird & long to explain. anyway,shots of individual parts & diagrams of your "suits",even though that (no offense) not convinced about your "suits".

No offense taken bro! since you don't know me, you would have to be stupid to believe me. but if you did know me, you would know that i am completely serious about this stuff. im a little busy with school right now, but if on friday or saturday you remind me, ill give you some stuff as proof. Its really ok if you dont believe me. i get how crazy it sounds lol. If your interested in this stuff, maybe you should post on the web shooter forums.
 
a few hundred. but if you dont know what your doing or have the resources, just buy one.
 
pics are going to be a little delayed, im sick right now. barely typing this without throwing up. and i

scratch that, i just threw up. im not lying, or making up an excuse. i really will put the pics up. if you still have some suspicions, go pm wadaltmon. he knows that it do this stuff, and he's building a spiderman themed RLSH kit, complete with a webshooter. he has also seen my designs. oh, but i do have one pic that i can post for now. its not much th

just threw up again

not much but it is a part of my spiderman suit. unfortunatly its just a concept art for something i call a bracer-taser. ill pm it.
 
I've been mulling over making a Spider-Man shell mask to go under my Zentai Zone suit which I have recently purchased. The following is a process which I think will give me a satisfactory and low cost result.

Make a face mould using Plaster of Paris bandages. Do this in two parts, front and back of head, ensuring there is some overlap to the two sections. Use Clingfilm/bald cap/swimming hat to cover your hair. Apply a thin layer of Vaseline to the face as a release agent. Work the bandages so that they are tight on all parts of the face. Ensure you leave the nostrils clear.
Do the front of the face first, wait until the bandages have set and carefully lift from the face. Repeat for the back of the head. Use three or four layers of bandages.

When both are fully set, fit the front and back onto your head and use a marker pen to draw a line onto the cast where the overlap occurs.
Cut away the excess so that you have a good fit of the two halves. Make good any irregularities on the inside of the casts with plaster or clay.

When you are ready to make the foam cast, use duct tape, string or rubber bands to hold the two pieces together securely. Perhaps use a small bit of plaster inside on the join line to minimise seepage. But do make sure it is smoothed out and fully dry before proceeding. Smear the inside of the plaster cast with a thin layer of Vaseline to act as a release agent.

Mix up the two part polyurethane foam and slowly pour it into the cast. Leave it upended, allowing sufficient time for the foam to expand out of the neck hole and fully cure.

Once this is done, remove the plaster and smooth out any discrepancies in the foam cast. Where the foam has expanded past the neck line, cut it flat and level so it can stand up properly.

Using the foam cast, sculpt your face shell onto it with non-drying clay or plasticine. Work it until you have the desired shape. Work in some keying locations to the cast. Coat the clay with a thin layer of Vaseline as a release agent.

Use Plaster of Paris bandages to create the negative of the face shell, working up to the keying points on the head cast. Once this sets, carefully lift it from the clay and clean it up.

Carefully remove the face shell clay from the cast, leaving the location parts in place on the foam cast. Ensure every bit of clay is removed.
Coat both the face shell negative and foam cast with a thin layer of Vaseline to act as a release agent.

Using either liquid latex or silicone mould, carefully pour enough of it into the face shell negative and then press the foam cast into the liquid until the location sections meet where they need to. You want the casting liquid to come out a little past the edge of the face shell once the foam cast is pressed into final position.

Leave this to dry out as long as is required depending on the mould material being used.

When ready, remove the face shell and carefully peel off the latex/silicone face shell. Clean off the foam cast as it can be used for other projects.
Cut out eye holes, along with nose and mouth holes in your face shell mould.

With luck and a following wind, you should have a snug fitting and flexible Spider-Man face shell to use under your mask.

Any thoughts?
 
Last edited:
Howdy ya'all. It's been quite a while but I love to see that people are still working toward making the best suits they can, keep it up! I lived in NYC for a while and decided I'd wear my suit in Times Square for a while to make a few extra bucks, anywhoo here's a pic someone caught of me riding the subway.

a>
 
Bump.

Anyone have some advice on how i could get a good looking costume under $130? I could try to make one if necessary.
 
Bump.

Anyone have some advice on how i could get a good looking costume under $130? I could try to make one if necessary.

yes, make the hat version of the spider-man mask with red fabric from the fabric store, a spider-man shirt with the front part of the suit and blue pants.
 

Users who are viewing this thread

Back
Top
monitoring_string = "afb8e5d7348ab9e99f73cba908f10802"