Hey All. I made this thread for anyone curious on how to make some very affordable MARK V IRON MAN ARMOR for themselves and never knew how to do it
The tutorial is courtesy of Fetts.Sobriquet of the theRPF.com
which you can view it in full here
http://www.therpf.com/showthread.php?t=84259
and with his permission I am posting it here so its to the point:
Tutorial:
I've decided to make a tutorial on how to make a riveted plastic Mark V costume. The $25 dollars is the cost of the two buckets you will convert into your costume. Let me preface this with a little disclaimer. I'm kinda running through this build quickly just to make the tutorial. I'm not focusing on making the suit beautiful. It's more about getting all the information to you than me making a suit.
AFettFullofDollars over at TDH figured out that you could make some pretty decent Fett armor out of a trash can 5 years ago.
I guess I also assumed everyone knew about this method since the Fett builders have been doing something like it for so long.
It actually turns out pretty nice and is cheap and easy to do.
You may think that you've never seen anyone do this before. Well, odds are you probably have seen it, you just didn't know it.
I'm not kidding. Go to walmart, buy a trashcan (comes in black too) it already has the curves you need. You don't even have to heat the plastic up with a heat gun and shape it, although you can a little if you want.
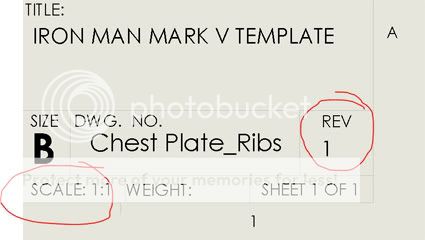
Here I'm going to build the Mark V step by step. I'm posting my templates but they are a work in progress. You might want to keep an eye on the version of the template that is currently posted so you know what is the newest.
Current Template version is 1
templates so far are of the Chest - Arc, Breast plates, Ribs and pectoral section.
Download Templates
* Note about the Templates. Make sure you check the scale some will be 1:2 scale.
* Note about the Templates. Make sure you check the scale some will be 1:2 scale.
I'm currently drawing the templates so some are missing. I'm posting them now so you can get an idea of how they work.

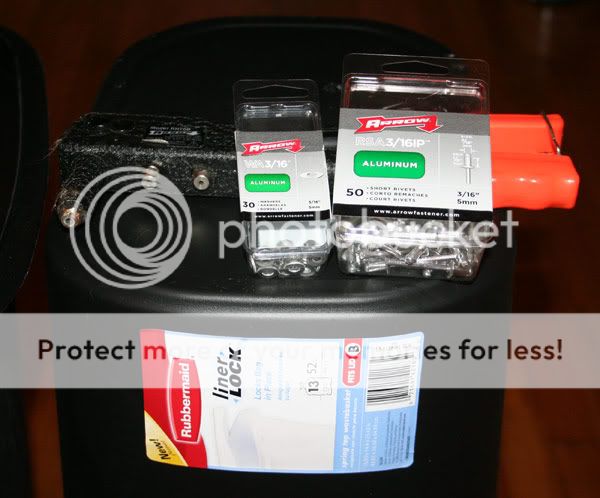
The first thing I did was to go to Walmart and buy two 13 gallon plastic trashcans. Cost me $24 dollars plus tax.
You'll also need some tape to tape the templates to the trashcans, a hand riveter, rivets, washers, a drill, and a hobby knife.
I went with 3/16" 5mm rivets and washers, but it's up to you what size you wan to use.
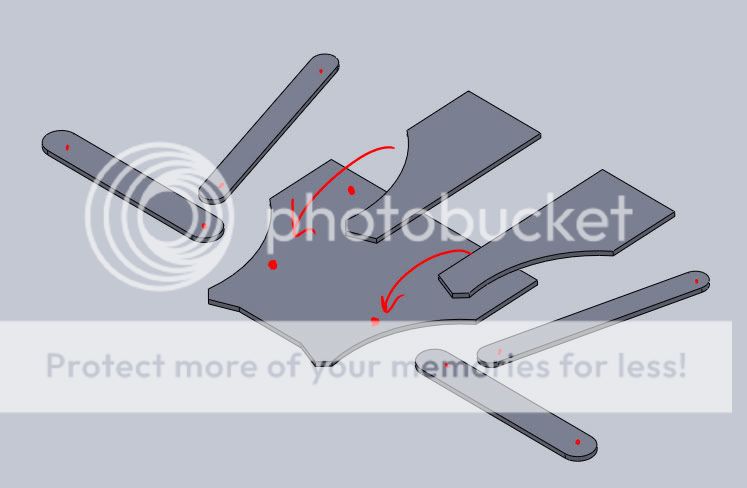
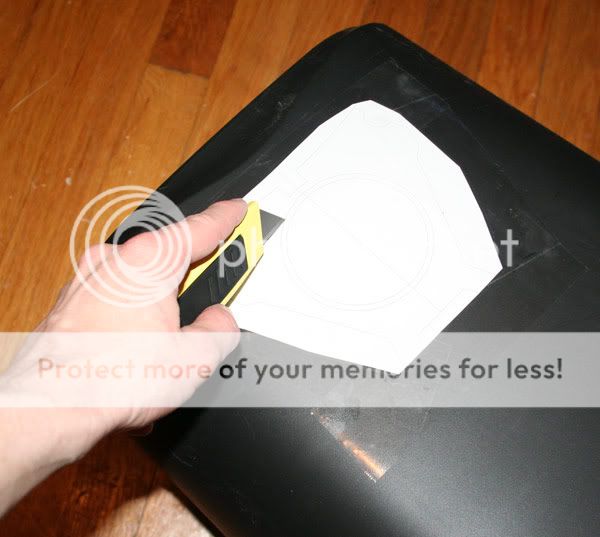
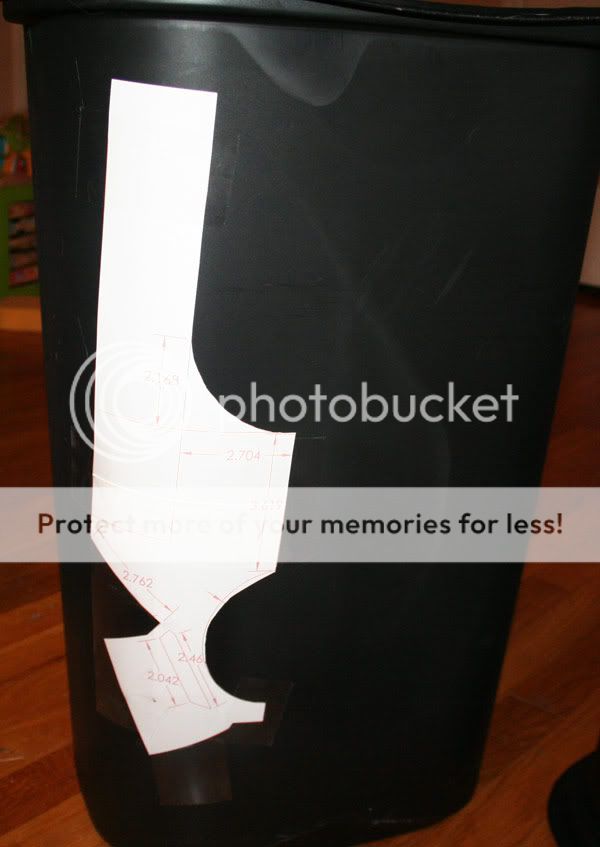
All you have to do is print out the templates at the appropriate scale, cut them out, and tape them to the trashcan.
Try to utilize the curves in the can and match them up with how you want your part to bend. Then just carefully cut the part out of the can. Make sure you score everything. Make multiple, calculated, shallow cuts. Don't try to cut this out with one deep cut because the blade could slip and you could cut yourself very badly.
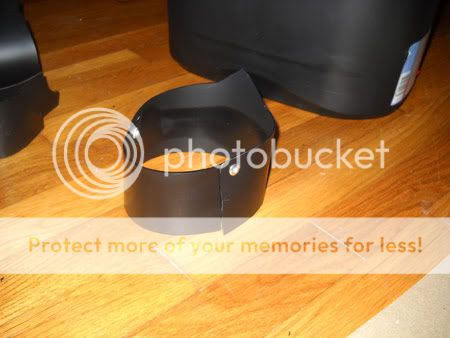
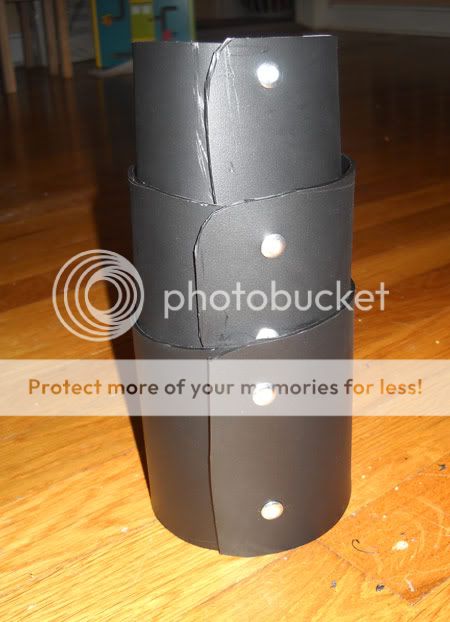
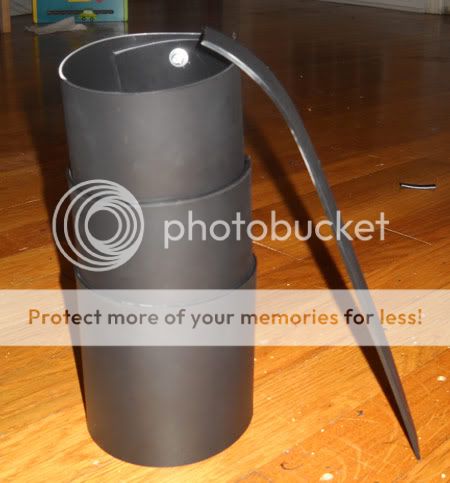
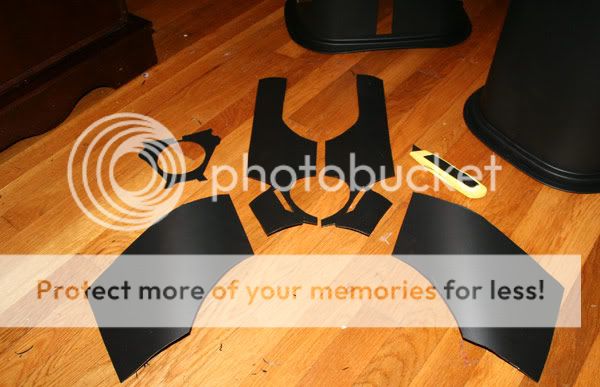
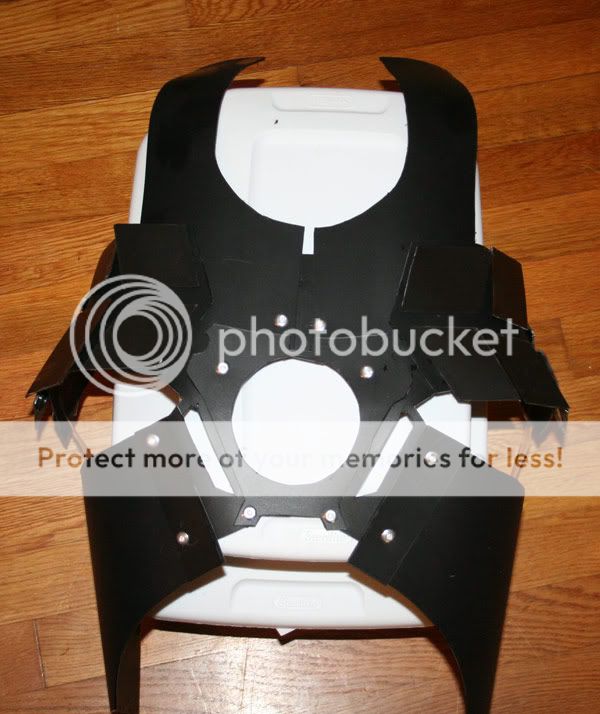
One you get most of the chest cut out it will look like this
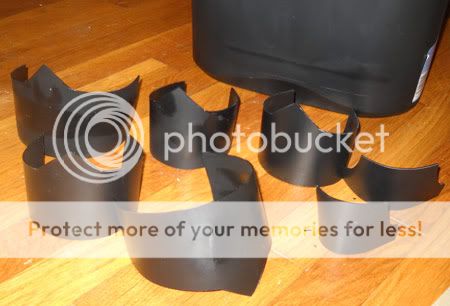
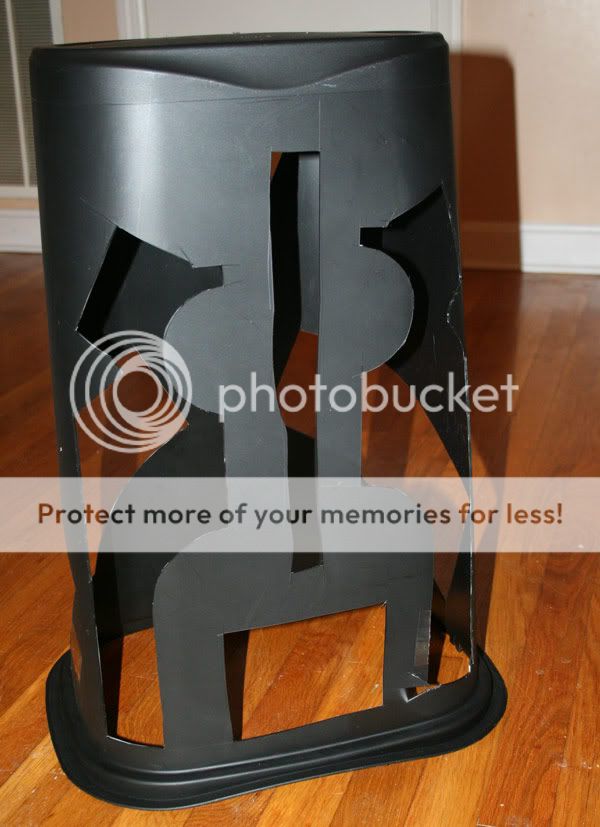
The trashcan will look something like this
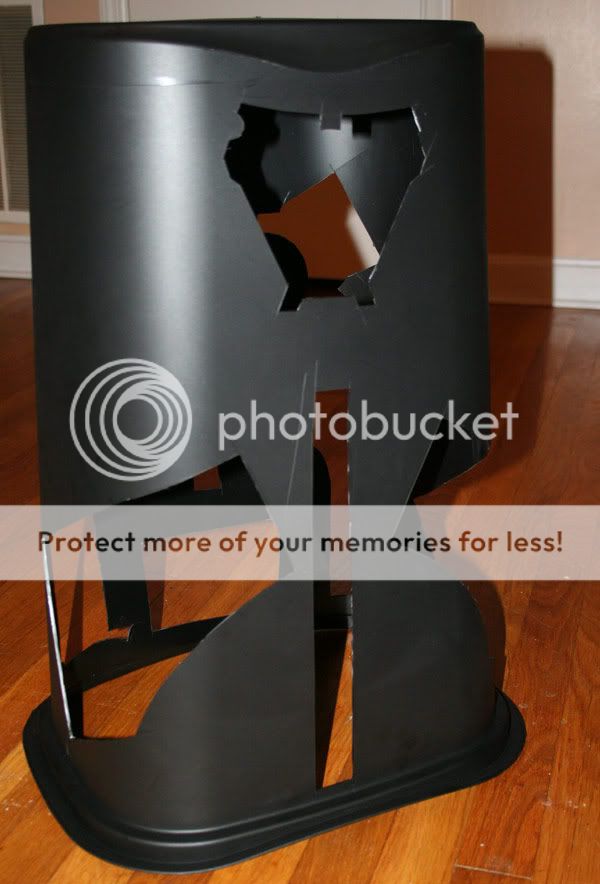
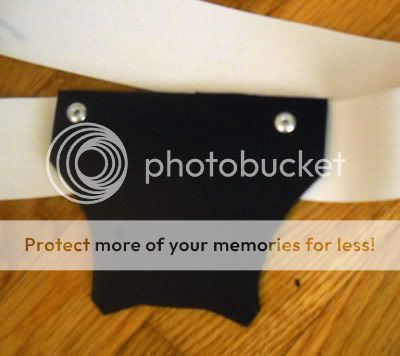
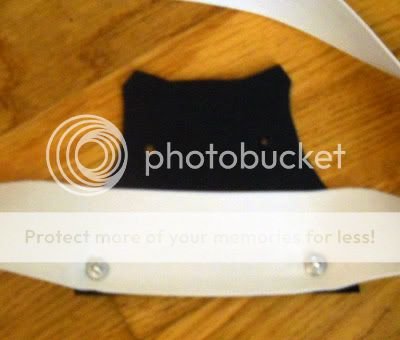
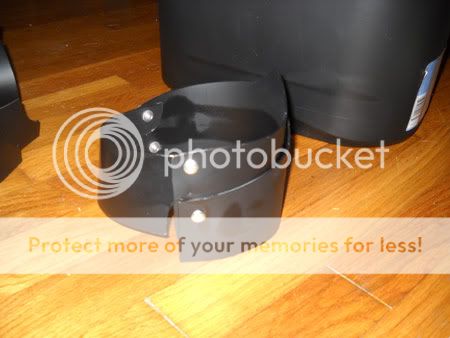
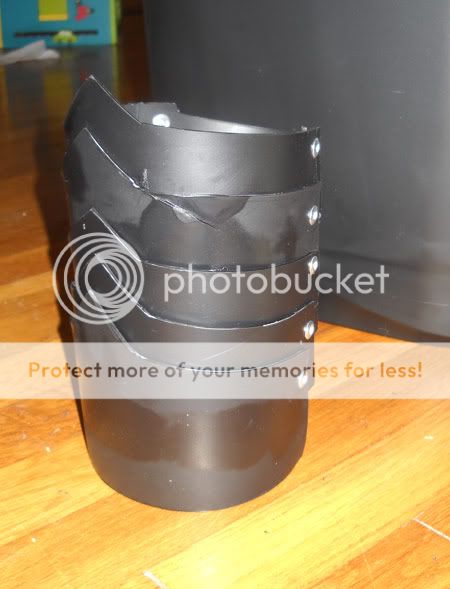
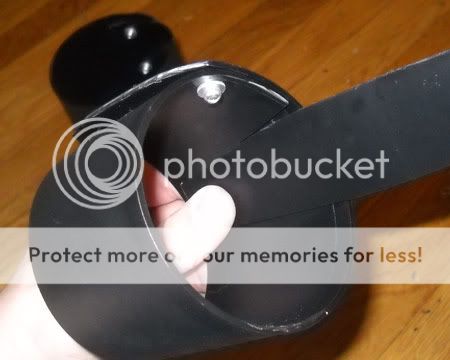
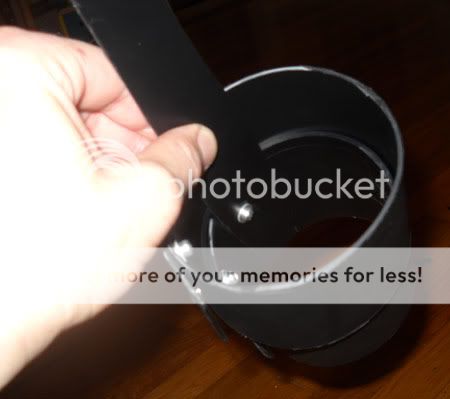
Now just rivet it together. Where ever you want to place a rivet drill a hole in the through both layers of material, and pop a rivet.
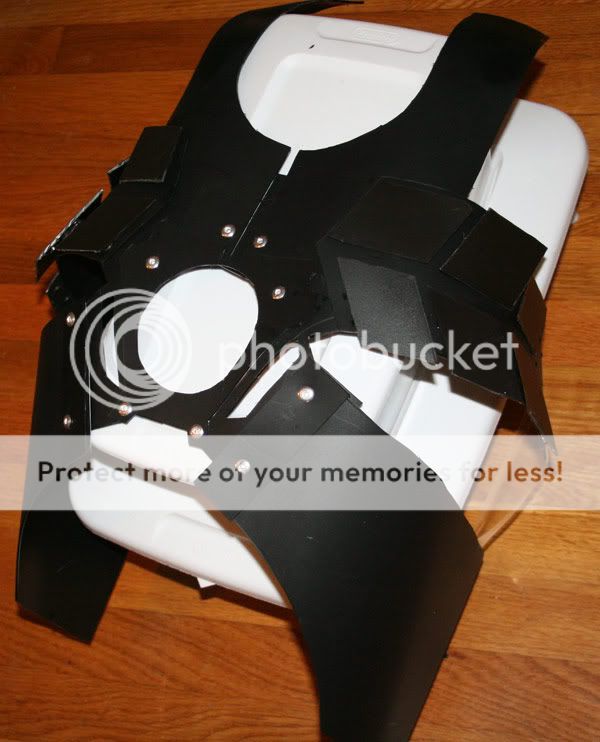
When you're ready to place the tread detail on the on the upper chest area, simply cut out the shape and super glue the detailing on. You can rivet it of you want, it's your suit.
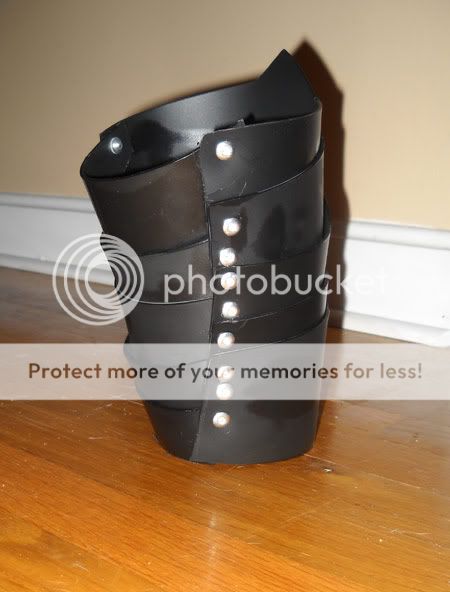
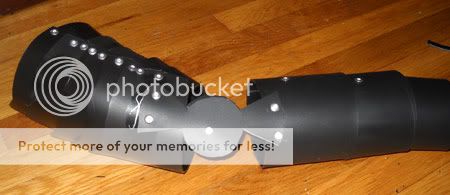
So, today we finish up with something looking like this. Not bad for about 2.5 hours of work.
The tutorial is courtesy of Fetts.Sobriquet of the theRPF.com
which you can view it in full here
http://www.therpf.com/showthread.php?t=84259
and with his permission I am posting it here so its to the point:
Tutorial:
I've decided to make a tutorial on how to make a riveted plastic Mark V costume. The $25 dollars is the cost of the two buckets you will convert into your costume. Let me preface this with a little disclaimer. I'm kinda running through this build quickly just to make the tutorial. I'm not focusing on making the suit beautiful. It's more about getting all the information to you than me making a suit.
AFettFullofDollars over at TDH figured out that you could make some pretty decent Fett armor out of a trash can 5 years ago.
I guess I also assumed everyone knew about this method since the Fett builders have been doing something like it for so long.
It actually turns out pretty nice and is cheap and easy to do.
You may think that you've never seen anyone do this before. Well, odds are you probably have seen it, you just didn't know it.
I'm not kidding. Go to walmart, buy a trashcan (comes in black too) it already has the curves you need. You don't even have to heat the plastic up with a heat gun and shape it, although you can a little if you want.
Here I'm going to build the Mark V step by step. I'm posting my templates but they are a work in progress. You might want to keep an eye on the version of the template that is currently posted so you know what is the newest.
Current Template version is 1
templates so far are of the Chest - Arc, Breast plates, Ribs and pectoral section.
Download Templates
* Note about the Templates. Make sure you check the scale some will be 1:2 scale.
* Note about the Templates. Make sure you check the scale some will be 1:2 scale.
I'm currently drawing the templates so some are missing. I'm posting them now so you can get an idea of how they work.
The first thing I did was to go to Walmart and buy two 13 gallon plastic trashcans. Cost me $24 dollars plus tax.
You'll also need some tape to tape the templates to the trashcans, a hand riveter, rivets, washers, a drill, and a hobby knife.
I went with 3/16" 5mm rivets and washers, but it's up to you what size you wan to use.
All you have to do is print out the templates at the appropriate scale, cut them out, and tape them to the trashcan.
Try to utilize the curves in the can and match them up with how you want your part to bend. Then just carefully cut the part out of the can. Make sure you score everything. Make multiple, calculated, shallow cuts. Don't try to cut this out with one deep cut because the blade could slip and you could cut yourself very badly.
One you get most of the chest cut out it will look like this
The trashcan will look something like this
Now just rivet it together. Where ever you want to place a rivet drill a hole in the through both layers of material, and pop a rivet.
When you're ready to place the tread detail on the on the upper chest area, simply cut out the shape and super glue the detailing on. You can rivet it of you want, it's your suit.
So, today we finish up with something looking like this. Not bad for about 2.5 hours of work.
Last edited: