• The upgrade to XenForo 2.3.7 has now been completed. Please report any issues to our administrators.

Legends Of Gotham City: A Collection of Custom Figures

caneheaddrillout.jpg


canetipdrillout.jpg


I brushed the new wooden walking stick with few quick coats of flat black paint and cut it to a length that I deemed appropriate for The Joker. When I glued the golden joker head and ball tip pieces to the wooden rod, the cane was complete.

Canepaint1.jpg


Canecomplete.jpg
 
My Legends of Gotham City Collection now includes a custom Clown Prince Of Crime… The JOKER … and he’s ready to terrorize Gotham City!

Hee!! Ha, ha, ha, ha, ha, ha, ha, ha!!!!!!!

Actual Custom Action figure height: 6.5 inches.

TheJoker1.jpg


TheJoker3.jpg
 
THE RIDDLER

Given the choice between Edward Nigma’s two comic book costumes (Re: original green tights costume VS green business suit with derby), my vote goes to the tights.

But unlike so many other things in The Batman universe, this is a not matter of mere personal visual preference.

As I see it, Nigma has always been a character with two very distinct personalities. And interestingly enough, each personality seems linked to either of the outfits that he is wearing at the moment:

Clad in his suit and derby, he is a very subdued deviant… undoubtedly one of the most cerebral and cunning arch criminal geniuses in The Batman’s classic rogues gallery.

suitriddler.jpg


chaseriddler.jpg


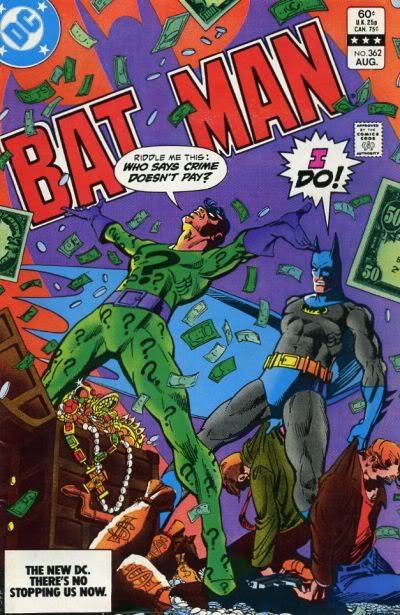
However when outfitted in electric green tights, covered with question marks , he transforms into a twisted and dangerously volatile psychotic… cackling maniacally… leaping and prancing about as he challenges The Batman and Robin during his latest caper. He becomes the very embodiment of the kind of villainous madness that is found only in Gotham City.

To me, this is when the nefarious Edward Nigma truly becomes The Riddler

Batman_362.jpg


riddler4.jpg


When I initially conceived of this Legends of Gotham City Collection of custom action figures, I honestly expected The Riddler to be one of the easier figures of the series to create. I saw him consisting primarily of a simple head swap and maybe a re-paint of an already existing figure. However, in the end, he proved to be a far more complex character than I had expected… in some respects, even forcing me to employ all new customizing techniques that I had never attempted before.
 
Having settled on Nigma’s tights costume, the first issue in the creation of my custom figure became selecting an appropriate base body to portray his physical stature:

I have always seen this character as wiry in his build… not at all brawny or muscular (as some artists have occasionally depicted him). Also, while not being as short as, say, The Penguin, he is, nevertheless, below-average in height. All in all, The Riddler is physically a real weasel-runt of a man in the world of muscle-bound comics men.

This very specific prescription really narrowed my choices when I attempted to establish a base body for this custom figure.


Choosing A Base:

In 2005, DC Direct released a “First Appearance” series of hero and villain figures that included The Riddler in his tights costume. Like the other figures in the series, The Riddler was produced in a scale that was incompatible with the other action figures of my emerging collection. He was sculpted with much more barrel-chested bulk and muscle tone than I intended for The Riddler to have. And his distorted face sculpt also left quite a bit to be desired for my tastes.

FirstAppearanceRiddler1.jpg


Five years later, the DC Direct Detective Comics Boxed Set was released, which included a re-paint of the “First Appearance” action figure.

13898_a_full-1.jpg


The newer figure was given a brighter green paint deco, and a different head sculpt. Unfortunately, the figure remained over-sized and overly muscular for my needs… with a face sculpt that was not much of an improvement over the first variant.

KGrHqQOKjE4jge0JrBOTvQY9Lg48_3.jpg
 
The Riddler made two appearances in Mattel’s DC Universe Classics Line. First, there was the suit and bolo hat version. Honestly, if I had not already rejected this version of the character because of his suit , I would CERTAINLY have rejected this figure because of this horrendously awkward, lanky, and off-balanced sculpt by The Four Horsemen Studios (much more on this later during my WIP analysis of my custom Two-face and Bruce Wayne figures)/

DCUCRiddlerfront.jpg


Soon afterwards, the costumed tights version of The Riddler made its debut. Unfortunately, it was sculpted with an even more heroically muscular build than the DC Direct Riddler offerings.

DCUCRiddler.jpg


On the bright side: The head sculpt on this figure was exquisite. It was absolutely the sculpt that I wanted to use on my custom action figure. The wry, mischievous smirk sculpted on this figure’s face spoke volumes about the Riddler’s cunningly villainous nature. Perfection!

IMG_9101a.jpg


The Mattel DC Universe Classics Line offered a skinny and shorter body in the form of their Thaal Sinestro release from 2008. This is the figure that repeatedly came up in conversations regarding a more suitable base body for Mattel’s DCUC Riddler.

But upon closer examination, I found this sculpt (once again) to be inappropriately lanky and anatomically off balance. The figure boasted a level of (heroic) muscular definition (in the chest, abdomen, back, and arms) that I felt were completely wrong for the custom Riddler action figure that I was working to create.

DCUCThaalSinestrofront.jpg


DCUCThaalSinestroside2.jpg


DCUCThaalSinestroback.jpg
 
A Body In My Closet

As I mentioned in the very first post of this thread, I was not at all interested in animated-style sculpts of these characters when I started this project. It was (and continues to be) my intention to have all 15 characters of this series match stylistically and scale-wise with each other. Strictly comic-book style for the entire collection.

Ironically enough, however, it was ultimately an animated-styled action figure version of The Riddler (sitting in a parts bin in my closet) that provided the most suitable base figure for my custom! Of course, I was VERY reluctant to use the figure at first. But pretty soon, I became confident in my own ability to transform the figure’s style to match the rest of the (comic book-styled) characters in my collection.

Back in 2006, DC Direct released a Riddler and Robin Deluxe Two-Pack based on the 1970’s “Super Friends” Saturday morning cartoon. The action figure had the thinnest, most ordinary body that I could find for a character in this scale (without being anatomically marred by all of the obtrusive points of articulation found on DCUC figures). With virtually no bulging muscle tone sculpted to his physique, this Riddler promised to be a perfect base body for my needs. And standing at 6.25 inches, he stood noticeably shorter than the average 6.5 inch “Super Hero” sculpt provided by Mattel’s DCUC line.

On the downside, I was not at all interested in the Super-Friends cartoony-style head/ face sculpt, nor the strangely oversized gloved hands (with no swivel articulation to speak of). The lack of cleanly detailed surface sculpting (Re: overly cartoony belt and buckle, the lack of a raised collar edge on his tights, etc) really left me cold. The overly simplistic paint deco (limited to two silly-looking purple question mark insignias) didn’t help matters much either.

SuperfriendsRiddler.jpg


Sigh… alright… time to get to work.
 
“Magic Erase”

I began my preliminary work of this figure by scraping, cutting, filing, boiling and popping off all of the items that I intended to discard on this figure.

First I scraped away the big cartoonish purple question mark insignias (on the front and back) with a razor blade, and then I gently sandpapered both areas to prep them for re-paint. I did this essentially to reduce the number paint coats that would be required to during the final paint / deco phase of this figure. I knew that those purple question marks would be a major pain to try to paint over of I did not get rid of them now.

Emblemerase1.jpg


Emblemgone.jpg
 
“Give That Man a Hand!”

The next thing that I felt required serious attention was the action figure’s over-sized, “puffy” looking, gloss purple gauntlets and hands (with NO swivel articulation and inexpressive hands that were not designed to hold anything). Addressing all of those issues would certainly require a fair amount of surgery.

I found some suitably (smaller) sized gloved hands on a DC Direct Silver Age Joker Action Figure sitting in my parts bin. What I liked most about the hands were their character-appropriate expressiveness. While the right hand was sculpted in a grand open-palmed gesture, the left hand was sculpted in a closed fist with a hole through it, engineered perfectly to hold the question mark staff that I had planned for The Riddler.

NewGlovehands.jpg


Now, although these Joker hands were engineered to swivel at the wrist, I felt it was more suitable (and physically more accurate) for The Riddler’s hand articulation to swivel farther up, at the cuff of his gauntlets.

I chopped out the Superfriends figure’s original goofy hand “mitts”…

Newglove1-1.jpg


… and then I Dremmelled and sand papered the remaining gauntlet cuff sleeve into a slimmer profile to marry more appropriately with the smaller Joker hands.

NewGlovesshapeup.jpg


NewGlovesanding.jpg


NewGloveFinal2.jpg


NewGloveFinal.jpg
 
Once I was satisfied with the new slimmer and smaller gauntlets for The Riddler, I set about the task of converting them to swivel articulation.

In the past whenever I have tried to add articulation where it did not previously exist, I have generally disliked attempting to engineer working articulation from scratch since the moving parts tend not to have a nice tight factory fit that allows for SMOOTH swivel/pivot/roll/ etc. I decided to kit-bash the swivel wrist articulation parts from an action figure that already contained them to avoid this problem.

The DC Direct “Detective Comics” Riddler figure came in very handy here. That figure was equipped with a nice, tight, simple, swivel gauntlet articulation, with a very effective pin and socket configuration.

DetectiveRiddler.jpg


I cut both (inarticulate) “hybrid” gauntlets off of the custom figure’s arms and amused myself when I compared their sleek size and shape to the virtual baseball mitts from the DC Direct “Detective” Riddler figure.

Glovearticulate3-1.jpg


To begin my articulation kit-bash, I Dremelled an open cavity into each forearm stump of my custom figure.

SleeveCuffDrillOut1.jpg


SleeveCuffdrillout2.jpg


Then, using the “Detective” Riddler figure, I cut away a section of his arm stump containing the socket for his gauntlet articulation.

Sleeveplugborrow.jpg
 
Using my Dremel rotary tool, I shaped the severed arm stump socket into a “plug” that would fit neatly and tightly into the cavity that I drilled in the custom figure’s forearm.

Sleeveplugform.jpg


Sleeveplug.jpg


With the new swivel socket plug glued permanently in place, I worked the edges a bit with sandpaper to shape its contour cleanly to match the circumference shape of the custom figure’s forearm.

Sleeveplugtestfit.jpg


Sleevecuffshapeup.jpg
 
The next order of business was to adapt the “hybrid” custom gauntlets that I created to have the articulation pin that would allow them to swivel. I accomplished this by drilling a large cavity directly into the cuff of each gauntlet.

Glovearticulate1.jpg


Glovearticulate2-1.jpg


I then cut a section of the “Detective” Riddler’s gauntlet that included the swivel pin and very carefully shaped it into a makeshift “cork” that would fit into the cavity of my new gauntlets.

Glovearticulate4-1.jpg


Glovearticulate5-1.jpg
 
The next thing that needed to go was the silly-looking yellow belt buckle. I razor-cut it off and sand papered the waist band smooth.


Beltprep1.jpg


beltprep2.jpg


beltprep4.jpg


Beltprep3.jpg
 
”Head Case! Dr. Darklord, please report to surgery, stat!

I loved the DCUC Riddler head sculpt, but I was a bit dissatisfied with the rear neck hair line. It looked to me that the hair line had an abruptly short cut-off, with a very un-natural, blunt looking shape. The figure’s internal head / neck ball articulation pin was even partially exposed because of this problem. I felt that I was going to have to extend the rear hair line lower and shape it into a contour that made sense.

rearnecklinestock.jpg


In order to accomplish this hair line extension, I retrieved a DC Direct Deadman head sculpt from my parts bin, and carefully sliced out a section of his rear hair line. I attached this new appliance to the rear of The Riddler head sculpt and shaped its contour with a razor blade. Using white squadron putty, I filled the seam between the two parts, and sculpted new waves of hair to blend seamlessly with the existing sculpt.

Deadmanhair1.jpg


Deadmanhair2.jpg


rearnecknewhair1.jpg
 
Prepping a Prince Of Puzzlers for Paint

I decided pretty early on that I wanted the costume on my custom Riddler action figure to be colored in a more vibrant green than initially provided by either DC Direct or Mattel’s DC Universe Classics.

Naturally, that meant a tediously extensive process of prepping the figure for full re-paint. The arms and gauntlets were dismantled off of the figure for clean prep and separate paint treatment. I wet sanded the action figure (with 240 grit sand paper and 91% isopropyl alcohol to simultaneously strip the factory paint and prep the surface for repaint. The procedure was slow and deliberate, requiring 2 full days of sanding by hand. Use of laquer thinner or “Goof-Off” remover is typically NOT a paint-stripping option for me when action figure customizing since I am VERY allergic to the fumes, and both products tend to actually melt any plastic they come into contact with.

bodysanding.jpg


bodypaintstripped.jpg
 
Once I was satisfied with the body’s state of prep, I next dealt with adding minor surface detailing that DC Direct skimped on with this action figure… most notably, the raised edge of the costume’s scoop neck collar. Even the Mattel DC Universe Classics Riddler figure resorted to simple paint (and no raised detail) to indicate the scoop neck collar. Lame.

Using micro-thin hobby styrene strips, I followed the original collar edge paint indication and laid down a new raised edge detail. To my eye, it is the addition of details like this that move this sculpt away from the animated style and bring it closer to the comic book style.


neckscoop1.jpg


neckscoop2.jpg


neckscoopstart.jpg


NeckScoop4.jpg


neckscoop3.jpg
 
With the new raised scoop neck in place, and the exposed neck properly masked off, I loaded my airbrush with a nice mixture of Citadel Scorpion Green paint, and got to work. Laying down layer after layer, I used a razor blade to gently scrape away any stray hairs and pieces of residue that appeared on my paint-work as it flash dried. This is the stage that I believe makes the all the difference between a factory-looking paint job, and a sloppy amateurish-looking one.

airbrushbody.jpg


AirBrushbody2.jpg


AirBrushBody3.jpg


paintkneecaps.jpg


paintedbody.jpg


With the base body painted, I carefully painted the exposed neck scoop area in flesh tone.

Fleshneckscoop.jpg
 
Oodles and oodles of question marks

Obviously, The Riddler’s myriad of question mark insignias are what give his zany costume all of it’s character.

Virtually ALL action figure versions of The Riddler create these markings with paint masks and factory spray applications.

I had a different idea.

It always seemed to me that The Riddler’s costume markings were probably applications attached to his tights rather than merely silk-screened or printed graphics. Consequently, I felt that they should be somewhat raised on the surface of the tights. This would also have the benefit of adding more surface detail to the overly-plainly detailed base figure.

To accomplish this, I turned to some very nice black vinyl question mark peel and stick stickers that I purchased (on a whim) from a craft store 10 years ago and saved! They really came in handy here!

With the main painted figure re-assembled, I started the slow (but fun) task of applying the question mark insignias one by one throughout the entire costume.
emblemtransfer1.jpg


emblemtransfer2.jpg


Emblemtransfer3.jpg


ChestInsignia.jpg


Emblemtransfer4.jpg


Emblemtransfer5.jpg
 
The typical approach for creating belts in this scale (by both toy manufacturers and seasoned action figure customizers), is to merely paint them on the figure. I, however, find that approach less elegant and less interesting than creating an actual belt as a separate garment. I believe this adds detail and richness to the custom figure. I knew I would approach The Riddler no differently.

Using a reproduction MEGO Batman utility belt, I sliced away the rectangular belt buckle border and painted it gloss black.

utilitybeltcutting.jpg


beltbuckle.jpg


I color-matched some purple satin ribbon to the shade of purple of The Riddler’s face mask and gauntlets.

purpleribbon.jpg


I attached the black painted belt buckle to a section of the purple ribbon, and then dressed the custom figure with the finished garment.

BeltandBuckle1.jpg


Beltandbuckle2.jpg


Beltandbuckle3.jpg
 
Armed with his (DC Direct) question mark staff, this finished Prince of Puzzlers… THE RIDDLER… is ready and eager to baffle the Caped Crusaders with more of his confusing riddle clues…

”Riddle Me This, Caped Crusaders…!!!”

Actual Custom Action figure height: 6.25 inches.

Riddler1.jpg


Riddler2.jpg
 
This is totally amazing...fascinating to see these custom figures coming together. Awesome detail! Thanks for documenting it!
 
Really awesome work! With how well you match the different parts together, they look like official figures. :woot:
 
O.M.G, amazing work, very informative cant wait to see more.:)
 

Users who are viewing this thread

Back
Top
monitoring_string = "afb8e5d7348ab9e99f73cba908f10802"