World Spidey Suits & Suit Creation methods. - Part 1

Continuing...

I thought about leaving it like this, but if I'm going for that 'movie look' (and yes I am), I'd need some shiny glass in there somewhere! :) So I bought these cheap sunglasses from Chinashop for about $5-6, making sure they're big enough to fit nicely in the spidey frames, and plastic enough so I could cut through them.
206laww.jpg


I used pliers to remove the screws that held the 'glass' in the sunglasses, and was left with this:
sl4bba.jpg


So, next step was to stabilize the frames on the glass (I've had two extra from trying out the linoleum), for which I used some weak see-through duct tape (not sure how you call it xD) and drew the inner lines with a thin black marker.
25k0ojq.jpg


Next, I used scissors to slowly and carefully cut the glasses along the lines while NOT making any unwanted cracks.
2vtrtsg.jpg


Btw, those lines I drew proved to be just an approximate size, since the other frames had a bit different shape. So I constantly compared and measured according to the black frames :)
296ncde.jpg


Continuing in the next post...
 
Again, continuing...

Here is what it looked like after a bit more 'sculpting' with scissors and finding an almost perfect fit.
2uy1t2u.jpg


And a shot of both eyes after applying acetone to remove the marker lines. :) looking nice, I'm VERY pleased how it's looking! Now just to glue the glass to the frames...
15y68bc.jpg


Then I realised that the filters are a bit to shiny from the inside and that I could get a lot better visibility if they were black, sooo... I've decided to pait them from the inside BEFORE gluing the glass on, so I removed the glass for now :)
352lldt.jpg


Here it is painted matte black. I've limited it only to paint the filter, because I want to be able to glue it to the mask as best as possible.
2iar1ut.jpg


Black filters from the inside, I think u can easily see the difference :)
295bqrb.jpg


I'll continue in a few hours with more photos, taking a break for now! :)
To be continued...
 
Thanks ParkerPeters :)

Continuing...
So, I put the mask over the dummy's head, put some paper between the dummy and the mask (so it doesn't glue to it) and carefully glued first one eye, applied pressure and waited a few minutes for it to dry enough so it holds.
21nmjbt.jpg


Than the other eye, same thing :)
qrlycn.jpg


Next, after both eyes dryed out as much as I could wait (about 10 minutes xD), I started to cut the mask fabric from the inside. I left a few milimeters of fabric which I glued to the filter from the inside, as additional security to hold the lenses and the fabric.
5ofr10.jpg


Now this is looking sweet! :D The lenses are holding perfectly to the mask. Superglue I used (Uhu) is holding much better than expected, considering it's just a rather cheap, 'classic' super glue. I also glued the glasses to the frames. Some glue is showing in the corners under the glass, but only from close view, so I really don't mind.
2zix0yw.jpg


Of course I had to try the mask out on me, can't let the dummy enjoy it all :D
kbpo9u.jpg


Continuing in the next post...
 
Continuing...

I've started to draw the outlines of the red parts of the costume. The idea I have is to cut out all the red parts and sew them on to the blue suit, making the blue skin-suit as a 'background' for the reds. So as a start I lined up the red suit as closely to the blue one (underneath) as I could, and started to draw the red outlines. Intentionally making stronger dots with a black marker, so they leave a mark on the blue suit underneath, so I know where to sew the parts. :) Anyway, you can see the photos...
2yxm62r.jpg


So here's the first outlining with a red marker, which I'll follow wit the black one.
2rfsv3q.jpg


And here is the black marker, doing it's magic :)
e85wdc.jpg


Next I did the whole suit. From the waist down I had to wear the suits myself, because my dummy has no legs.. Also I aligned both suits as best as I could to make the sewing easyer later on.
2rfcv4j.jpg


And a side shot.
vesyc.jpg


Continuing in the next post...
 
And the last post for now with updates...

Here are the both suits layed out, from the front...
28tum3a.jpg


...and from the back.
anoc4o.jpg


Some details of the red parts, outline which I'll cut, and a thincker line which gets sewed to the blue suit.
ipctw1.jpg


And some details from the blue suit, showing where to sew the red parts.
2vx0uo2.jpg


I plan to take the suits to the tailor that is capable to sew spandex well. I hope to be able to explain it well enough so it turns out as it should :)
I would sew it myself gladly, but unfortunately I have no skills in sewing and more importantly, I don't have a good enough sewing machine anywhere.
So, I hope it turns out well.

Only thing I have to do before is the gloves and than I'll take it to the tailor. In the meantime I'm ordering puff paint, and getting myself mentally prepared for the detailed pattern work :)

As soon as I have more news on how it's going, I'll post it here. Until then, all comments, critics and advices are welcome! :)
 
Not to get off topic, but i'm starting a spiderman costume and have read about how one method with the zipper is to have it go down the armpit and around the waist.

Does anyone have a picture with this example and how it's constructed?
 
Pattern is almost finished, tell me what you guys think.

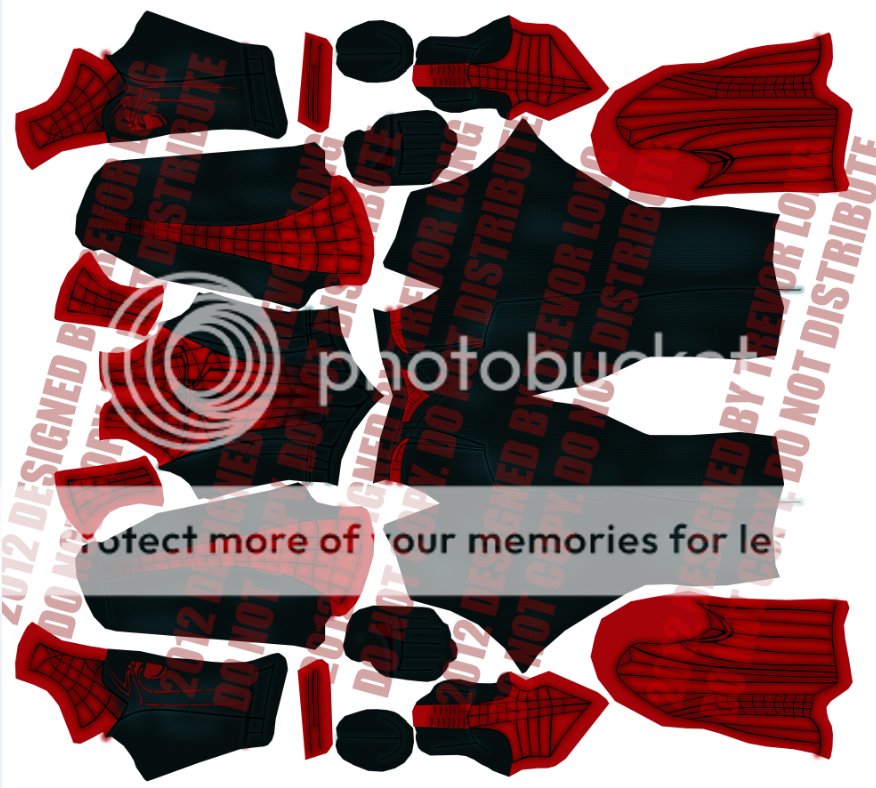
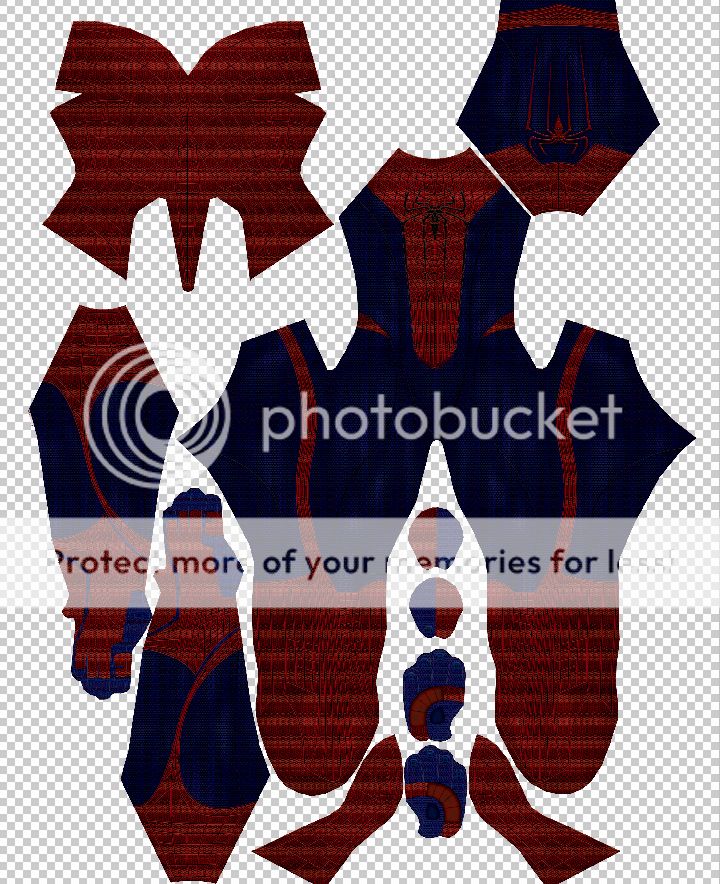
Here is an idea of how my seven piece suits will print out.
Patternfull-1.png


And thats that. I will post more when the mask pattern is done. Any and all criticism is appreciated.

Looking great and love the original take. Gradient is a very nice approach. To cut down on sewing and seams have you considered making the side neck/mask pieces a part of the arm as well as combining the back into on seamless piece?

That's how I did my ASM pattern. Excellent work can't wait to see how it turns out! :spidey:

asm1.jpg
asm5.jpg
 
Last edited:
And the last post for now with updates...

Here are the both suits layed out, from the front...
28tum3a.jpg


...and from the back.
anoc4o.jpg


Some details of the red parts, outline which I'll cut, and a thincker line which gets sewed to the blue suit.
ipctw1.jpg


And some details from the blue suit, showing where to sew the red parts.
2vx0uo2.jpg


I plan to take the suits to the tailor that is capable to sew spandex well. I hope to be able to explain it well enough so it turns out as it should :)
I would sew it myself gladly, but unfortunately I have no skills in sewing and more importantly, I don't have a good enough sewing machine anywhere.
So, I hope it turns out well.

Only thing I have to do before is the gloves and than I'll take it to the tailor. In the meantime I'm ordering puff paint, and getting myself mentally prepared for the detailed pattern work :)

As soon as I have more news on how it's going, I'll post it here. Until then, all comments, critics and advices are welcome! :)

Very nice work, I'm liking your method of going about this, it looks cool even without the puffpaint! You should see how it comes together without it, I think this works either way.

Either way, keep up the good work. :up:
 
Very nice work, I'm liking your method of going about this, it looks cool even without the puffpaint! You should see how it comes together without it, I think this works either way.

Either way, keep up the good work. :up:

Thanks! :)
Right now I'm trying to find a tailor who can sew lycra and who is willing to... So far no luck but I'm not giving up!
About the puff paint, I'll see how the sewing turns out :) But I plan to at least paint the webbing on with puff paint.
And also the muscles shading.. not sure yet if I'll do it, but if I am it's gonna have to be very careful work with some black spray-paint :D

Anyway, hope to have more news as soon as possible.
 
In the meantime I'm ordering puff paint, and getting myself mentally prepared for the detailed pattern work :)

If I can make a suggestion... you should REALLY entertain ordering some RD-407 mask making latex (it's only about $15 for 32oz) and tinting it (with artists acrylic paint) the color you want it. I originally started with puff paint and found the long term adhesion and durability to be really lacking. Additionally, it seemed to harden a bit more, making it crack off of the suit easier. Mask making latex is thick enough to give a good build, but still thin enough to soak into the pores of the lycra. It also stays nice and rubbery for years (my original costume from 3-4 years ago is still in great shape). To apply just go to Michaels, JoAnns or possibly a beauty supply house and buy a refillable bottle with a fine applicator tip (no more than a 1/16" opening). Mine was about 1" in diameter and about 4" tall and allowed a excellent amount of control when applying the webbing. Either way, your best bet for applying is (in my experience) to create a flat cardboard template you can stretch the finished sections of the suit over. It's just a heck of a lot easier to have it laying flat, instead of over a dummy, when you're doing the detail work. Finally, to really get good adhesion (no matter which way you go) make sure you're applying the webbing at about a 45 degree angle to the fabric, with a slight amount of pressure, to almost force it into the fabric. Otherwise, if it's just applied right on top it will just peel clean off. Just make sure to practice, practice, practice before you jump right into the final suit (duh). Just my 2 cents... :yay:

Spidey7pc.jpg

Wow thanks for the advice! I've already bought some 'pluster and liner pen' at a local arts and crafts store.. something like puff paint for textile. And also a small plastic bottle with a veeery thin applicator tip, looks great for the details :) I'll see how that puff paint tests out (since I already have it xD). But if it proves to be terrible than I guess I'll try the latex thing :)
And good idea for a flat surface, I thought of doing the pattern on the dummy but I guess it would be harder to control the lines. So a flat surface it is!

One other thing I forgot about the puff paint... It doesn't stretch really well (unlike the latex which I can stretch about 30%-40%). So If you do go with the puff paint try and stretch the costume to as close to actual worn size as you can get. I found the best way to do this was to mark several points on the suit while it's on (use a couple of small pieces of masking tape) and measue the distance between those points. Then when you're creating your template just try and stretch it to duplicate those dimensions (erring very slightly on the small side so it doesn't bunch when you wear it). No matter which webbing substance you use this will create the least amount of stress on them in the long run. Sorry if that's just common sense, but I found that you find a lot of things out the hard way building a full suit from scratch. :yay:

Lenses are AWESOME by the way!:applaud

It is common sense but thanks for mentioning it anyway :) I was thinking of stretching the material definitely before painting the pattern and the lines. It is a good idea to mark the points and measure the distance, I'll try that :)
After all it doesn't matter what the suit (actually the pattern and the lines) looks like while it's folded.. it matters what it looks like while being worn. So that puff paint lines (or whatever) remain without cracks as much as possible.
I will test this paint out definitely before actually applying it to the suit.. it might just turn out to be stretchy enough :D

Thanks, I'm also very pleased how the lenses turned out! Can't wait to continue working on the suit :woot:


EDIT: I've tested the paint on a small part of fabric, drew some lines and connected circles, let dry overnight and tried to stretch.. it really stretches nicely with the fabric, I'm surprised. Doesn't break at any point.. so it looks to be elastic enough :) I tried to find contents of the paint on the bottle but it doesn't say anywhere lol, just that it's water-based.
And I may have found someone in this silly town who can and wants to sew lycra for a costume :D So new updates soon, hopefully!
 
Last edited:
If I can make a suggestion... you should REALLY entertain ordering some RD-407 mask making latex (it's only about $15 for 32oz) and tinting it (with artists acrylic paint) the color you want it. I originally started with puff paint and found the long term adhesion and durability to be really lacking. Additionally, it seemed to harden a bit more, making it crack off of the suit easier. Mask making latex is thick enough to give a good build, but still thin enough to soak into the pores of the lycra. It also stays nice and rubbery for years (my original costume from 3-4 years ago is still in great shape). To apply just go to Michaels, JoAnns or possibly a beauty supply house and buy a refillable bottle with a fine applicator tip (no more than a 1/16" opening). Mine was about 1" in diameter and about 4" tall and allowed a excellent amount of control when applying the webbing. Either way, your best bet for applying is (in my experience) to create a flat cardboard template you can stretch the finished sections of the suit over. It's just a heck of a lot easier to have it laying flat, instead of over a dummy, when you're doing the detail work. Finally, to really get good adhesion (no matter which way you go) make sure you're applying the webbing at about a 45 degree angle to the fabric, with a slight amount of pressure, to almost force it into the fabric. Otherwise, if it's just applied right on top it will just peel clean off. Just make sure to practice, practice, practice before you jump right into the final suit (duh). Just my 2 cents... :yay:

Spidey7pc.jpg
huh, xcuse me @Brado, but are you that Brad Olson Guy who did that 5 pieces Spidey Suit ????
:spidey:
 
huh, xcuse me @Brado, but are you that Brad Olson Guy who did that 5 pieces Spidey Suit ????
:spidey:

It's been a few years but, yeah, that's me. :yay:

***Although actually a 7 piece suit***
 
It's been a few years but, yeah, that's me. :yay:

***Although actually a 7 piece suit***
Holy Walloppin Web-Snappers, Its Such An Honor To Meet Ya and to see ya on this forum, Man !!
BTW, Do You Have More pics of That Suit, Pls, That would be cool !!
:spidey: :yay:
 
Holy Walloppin Web-Snappers, Its Such An Honor To Meet Ya and to see ya on this forum, Man !!
BTW, Do You Have More pics of That Suit, Pls, That would be cool !!
:spidey: :yay:

Wow! Nobody's ever been honored to meet me before... neato! I'll see If I can track down any of my old pics. Unfortunately I've put on a few "Daddy" pounds in the last 2 years, so I don't cut quite as striking a figure as I used to. :oldrazz:
 
That suit is the basis of all the work I have done. Good to know it actually exists (I was told it was a hoax) is there any way you would post a pattern here? I would pay to see it.
 
Yeah that really looks like an awesome, true comicbook style spidey suit, Brado! :D
I'd love to see how you made it, or atleast more photos of it :)
And for instance how did you connect mask to the neck, around the belt, gloves and boots.. with a zipper or something else? It looks very well made.
 
That suit is the basis of all the work I have done. Good to know it actually exists (I was told it was a hoax) is there any way you would post a pattern here? I would pay to see it.

cableguy.jpg

Who told you that? What is his name? I want it.

Anyway, even I was told it was a hoax. Something about the shadow on the wall behind me... who knows? Oh, the good ol' internet. I've still got the physical patterns tucked away under the bed. I'll pull them out & show you how I did mine. It's kinda old school though. I made the entire outfit out of white lycra and then stood in the mirror and drew the delineation between the red and blue with a water soluble marker. Then I cleaned up the lines, cut the suit apart and made polystyrene tracing patterns out of the pieces to draw on the colored lycra. I was really trying to create something that a high school kid with limited budget could do (without all the dye-sub, cnc routed web molds, etc.).

Yeah that really looks like an awesome, true comicbook style spidey suit, Brado! :D
I'd love to see how you made it, or atleast more photos of it :)
And for instance how did you connect mask to the neck, around the belt, gloves and boots.. with a zipper or something else? It looks very well made.

That's actually my favorite part of the whole suit. I'll pull it out (might be this weekend) and snap some pics. If you're looking to do a multi-piece suit I think this is pretty cool... :cwink:
 
Last edited:
What's with the Thread Manager taking the credit for my thread? Thief!!
 

Users who are viewing this thread

Back
Top
monitoring_string = "afb8e5d7348ab9e99f73cba908f10802"