World Making a Spiderman costume

StanLee Wannabe

Civilian
Joined
Apr 29, 2008
Messages
387
Reaction score
0
Points
11
Ok guys. The other thread about "creation methods" got a little derailed. So after putting it up for discussion, no one had a problem with starting a new thread to discuss actual methods.

So how do we make sure we don't make the same mistakes? Well for starters, let's not post pics of complete, finished suits. That's fine for the other thread...to show off your work, but I'd like to ask that we not do it here. I'm not a mod or anything, so I can't tell people what to do...but I'm asking politely so that we can keep the discussion on materials and methods.

Heck, it's fine if this thread doesn't get a lot of traffic...and goes for months without any posts...as long as it fulfills the purpose of being a RESOURCE for people trying to make spider-man suits (and related suits...Venom, Carnage..etc)

Topics that are relevant include:

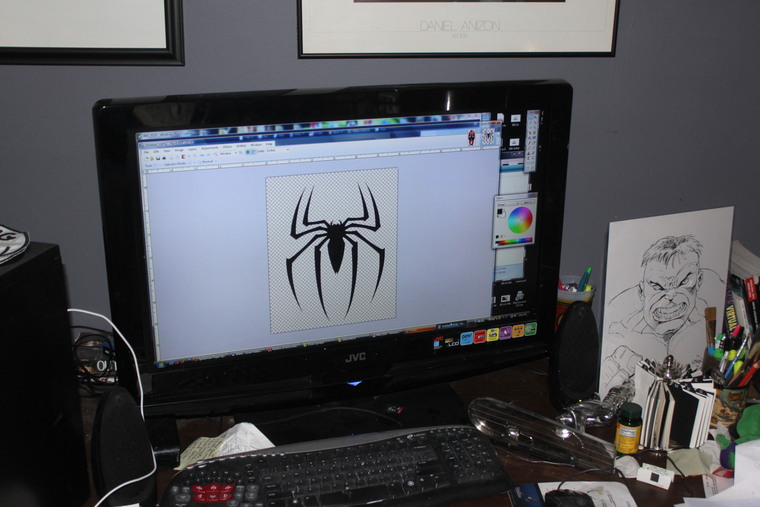
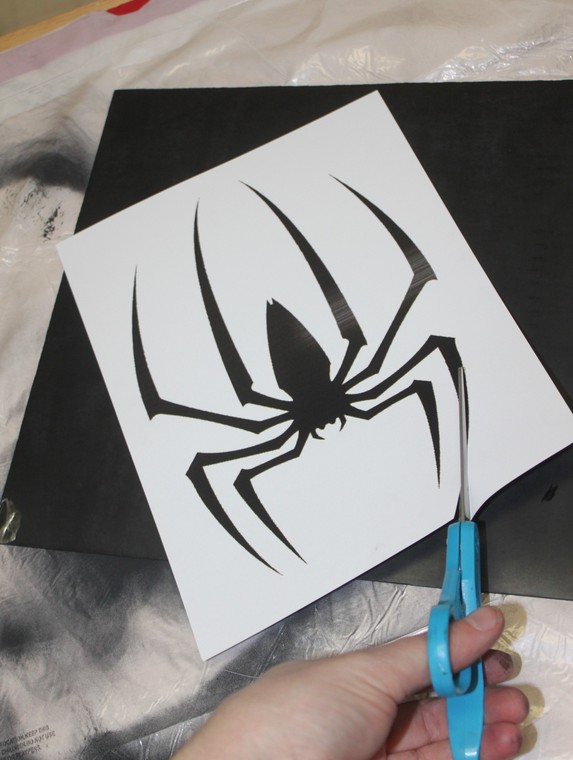
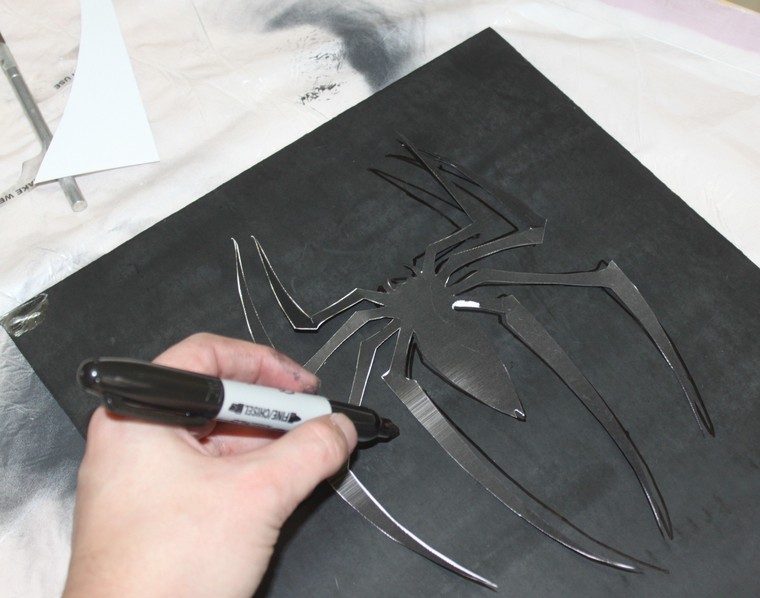
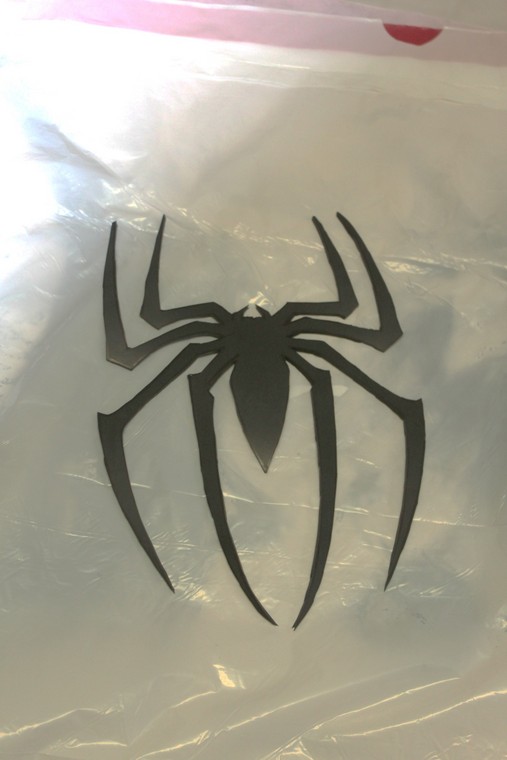
  • sculpting and molding things like chest spiders, faceshells, eyeframes
  • dye-sub methods: programs to use, trusted printers, perfecting color
  • sewing topics - different zipper locations, what kind to use, how to sew
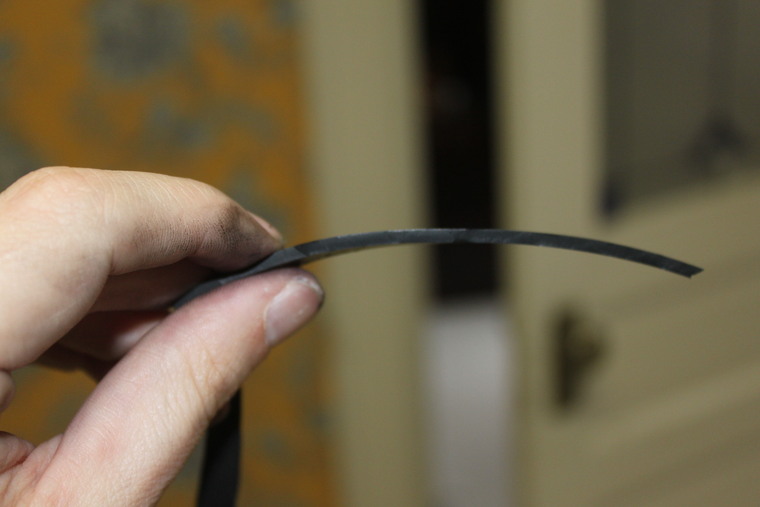
  • material topics - latex vs urethane for spiders, fiberglass for faceshells
  • troubleshooting
  • patterns
obviously this list isn't exhaustive...but I list them so we can all get on the same page.

Let me say right now, I don't think I know everything on all these subjects. There are definitely more talented people around these parts. The purpose is to help people who want to try to do this themselves a leg up.
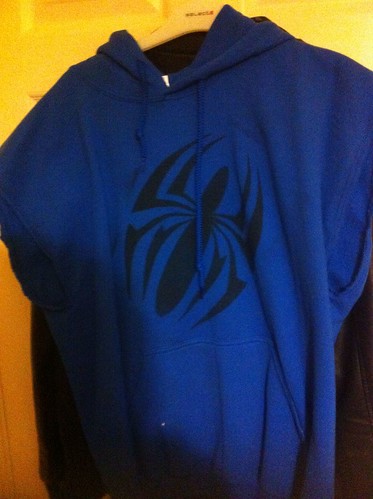
 
I thought I'd kind of get things started kicking around some ideas and methods. Again, there are better ways I'm sure.

Let's assume you want a comic-style suit with flat, black webs. The first thing you'd need would be a bodysuit. www.cosfun.net / www.milanoo.com / http://www.rootsuit.com all have plain bodysuits for sale.

So lets assume you buy a blue one for the base. You could also buy a red one and cut out parts of it to move things along. You'd either need a mannequin or a duct-tape dummy to get the proportions and sizing right(There are countless tutorials on making a "duct tape dress form" or "duct tape dummy" - google and you tube are your friend).

Cutting out just the right shape with the lines on the arm and over the shoulder won't be easy, but that's the trade off for having it pre-made, right? I think if you used pieces of scrap material you'd be able to get it right easier than not.

For attaching the top red part to the bottom blue part...there's sewing of course...but also stuff called "fabric interface" or "fusible bonding"...which is basically dry tape that you iron in between the two fabrics to hold them together. "Stitch witchery" is a common form of this stuff. It's easy to find at Wal-Mart or your local fabric store. (Obviously sewing is better, but I'm just brainstorming with the idea that DIYers might not be inclined to sew).

As Jester said in the other thread, one option for drawing webs on the suit would be screen printing. There's actually sprayable black fabric paint (as well at 3d puffy Tulip paint) that could be used for just such an application. Again, this won't be easy...but it's doable.

The chest and back spiders aren't necessarily hard. Simply print out the shape of the spider you like. You could a) cut it out of clay then make a silicone or plaster mold (not as hard as it sounds. with silicone you make a box out of science project board or cardboard...then mix part 1 to part 2 and dump it on top....with plaster its just a matter of mixing with water and dumping over the top.) or option b) you could go to www.mc-master.com and buy a sheet of urethane and simply cut out the shape. (For a red spider, you'd have to get urethane paint (which does exist) or tire paint.)

The same with the eyes frames. Either find a simple, 2d shape you like and mold it...or find sheet urethane and cut them. (I'm highly abbreviating this discussion...if people are interested in the ins and outs of molding, I'm sure that can be discussed if you want).

As has been brought up there are several ways to make the white/pearl parts of the eyes. You've got fabric, metal mesh, or plastic mesh. If you go with fabric, curtain material (doubled up) or buckram is a good place to start. If you go with metal mesh, you have several options - 1) coffee strainer mesh, doubled up, then spraypainted or 2) active wire mesh, found at Hobby Lobby or other craft stores, doubled up. I've also heard that garden plastic mesh can work for this - so keep on the look out when you're at the garden store.

For the soles, find a pair of aqua shoes or deck shoes/kung-fu shoes. If you want to really be fancy, you can put the shoes inside, pin the booties of the suit to the sides of the shoes, then cut and glue them down with barge cement/zap-a-gap/or shoe goo. Honestly I think spidey suits look great with the easier method of cutting of the tops of the shoes, applying glue inside the shoes and stepping down onto the soles. (You'll want to wear socks when you do this or saran wrap your foot...but there will be cleaning involved either way). Remember the red urethane paint or tire paint I talked about earlier? If you want that red sole look (Spiderman movies anyone?) perhaps (and don't quote me on this...) but red plasti-dip could be used to make the soles red. Just an idea.

It should be remembered, that there is a guy selling a pattern for a movie-style spiderman suit out there. I'm not affiliated with him at all so don't think I'm promoting his work. In fact, I can't attest to the quality of it. I have no idea if the pattern works or not. (http://www.spidermancostumediy.com/) I say "works" because theoretically there could be proportion problems or mistakes in the pattern...I haven't seen it so I don't know. If someone does spend the money on this, please find out the preferred method for matching the size of the suit to a real person. How does one size it up and down? (I don't need the info personally, but it would be helpful to the community)

That's just one possible way...of starting this project. It might even be a flawed method, but it's a start.
 
Thought I'd toss in here that as far as I know there are basically 3 places to put zippers on spiderman suits that I know of: 1) right down the back 2) starting at the armpits, down the back and going 90(ish) degrees over the small of the back and back up to the other armpit and 3) across the top of the back, over the shoulderblades, hidden by the line between the red and blue parts of the costume.

Obviously if you use 3d spiders, the zipper down the back won't work well.

Anyone got any additional ideas?
 
Some advise for those guys making suits... never use the word velcro and lycra in the same sentence unless you're warning people not to combine the two. I often get people requesting I add velcro.... DONT do it. The hook part of the velcro is deadly on lycra. Makes a real mess of it.

In my very first suit I had 1 zipper down the side neck/ back sleave as an entry point for the suit. Worked very well and was hidden. It did have a separate mask so this was possible.
 
On an old Spidey suit of mine I had two zippers running from the sides of the neck for entry into the suit. It also had zippers in the back of the ankles so you could easily slip your shoes on. The whole velcro thing is bad juju haha I learned that the hard way back in the day.
 
Hey guys! I've been pretty busy lately, but wanted to stop by and see what was up around here.

Thought I'd show off a new material that turned out better than expected. It would be perfect for people who dont like or have the budget to mold...but want to make a 3d urethane Spider-Man chest symbol.

Well it's pretty simple and kinda cool. www.mcmaster.com sells sheets of urethane of multiple thicknesses and in huge sheets.

Here's the exact type I got: here It cost $17


e81267336f62da330978f4f8f8097b3f286524d7.jpg
77f26b537763eab2048892f887567da4e1ff15fd.jpg


find your template and print it out...
Here's where I got my logo: deviantart

The Superhero Costuming forum has a library with TONS of different chest symbols (comic, retro, variant styles) ...and eye shapes (you could do with with eye frames too, ya know!)


eaf165356eac038efa460c588448b17f792e0b4f.jpg


Cut out your stencil

ec816f3b65a1038df681870a46f63aa841496e98.jpg


Trace it onto the urethane...


14d1643464ab0e83ff02171296f40c7d5924b73a.jpg
4b626a33a76aba5908c887f56db0b3cf0a0c8284.jpg


Black on black works...but you'd be better in retrospect getting one of those metallic paint markers in white or silver. As precise a point as you can.

I bought a 2mm thickness and it worked like a charm. Sharp scissors or an xacto cut through this stuff like butter.

78a1623a68aa0882f318e341f9e175bbb47b7f3f.jpg
d731603169ae028afc8b3bba845e357f82669745.jpg


McMaster-Carr also sells this urethane in RED...perfect for a back spider-symbol.


Epilogue
I just found a paint called "Trident U Mark it Paint" that works on rubber scuba gear...and comes in 12 colors. I'll be buying some and testing it so that perhaps you could make other parts ...
 
Thought I'd update this thread with a subject a lot of people want to know about...

creating the muscle shading pattern in photoshop and coloring the pattern.

I can't take the credit...a guy named Nick has a thread on the RPF about it:

http://www.therpf.com/f24/nick-fox-presents-spider-man-pattern-development-w-pic-heavy-tutorial-97460/


I've added some info about sizing and saturation in that thread also.

Hopefully Nick will come over here and post about it. He might have already in the other thread...I havent checked
 
I don't think I ever posted anything THIS in depth anywhere else besides the RPF. I know I posted a much shorter version of this on the very short-lived proboards forum, but this is the be all end all version of how to make a custom, warped-brick musculature for your own digital Spidey pattern. Enjoy!

Warning, what follows is EXTREMELY pic heavy.

The first step is to create a repeating brick pattern. I made an overly simplistic one for the purposes of this demo, but feel free to make it as crazy and complex as you want so long as it repeats smoothly.

Create a new document. (And make sure it's a fairly good size so that you can cram in all the detail you want) Make sure your background is transparent!

Screenshot2010-10-04at105027PM.png


Make a new layer and fill it with black:

Screenshot2010-10-04at105124PM.png


On a new layer, create the negative shapes of your pattern. (I used the rounded rectangle tool) Just make sure that the distance from the edge of the document to the beginning of your negative shapes is exactly half the distance BETWEEN the shapes to help it repeat cleanly:

Screenshot2010-10-04at105236PM.png


Then Rasterize the layer by right clicking on it.

Next Command+Click (Sorry Windows guys, I don't know the equivalent) on the thumbnail of the shape layer to select the shapes:

Screenshot2010-10-04at105253PM.png


Make the black, background layer your active layer and press delete, then delete your shape layer:

Screenshot2010-10-04at105312PM.png


Finally, do any last minute trimming to make sure it's all tile-able, and go to EDIT>Define Pattern:

Screenshot2010-10-04at105322PM.png


Give it a name:

Screenshot2010-10-04at105334PM.png


And now onto the REAL work...

Make a new document, and starting with a 50% grey as your first layer, create a gradient/muscle map by selecting areas and heavily feathering the selection before adjusting the brightness to create the illusion of high and low spots.

I just made a quick one for these purposes:

Screenshot2010-10-04at105744PM.png


Then go to Layer>New Fill Layer>Pattern:

Screenshot2010-10-04at105809PM.png


Screenshot2010-10-04at105820PM.png


More to come in part 2...
 
I couldn't keep you waiting, here's part 2!


Put in these settings (You can name the layer whatever you want though):

Screenshot2010-10-04at105858PM.png


And then scale your bricks in the next window to fit your project:

Screenshot2010-10-04at105935PM.png


Rasterize that layer by right clicking on it, and then you're ready to begin.

Using the polygon lasso tool with a pretty big feather on it, with the brick layer active, select an area just above one of the highlights:

Screenshot2010-10-04at110017PM.png


The go to Filters>Distort>Spherize

Screenshot2010-10-04at110023PM.png


Screenshot2010-10-04at110027PM.png


Play around with your settings. This is more art than science, so try playing around with just modifying it vertically or horizontally, with different percentages. The Spidey suit has a lot more vertical spherizing than it does horizontal spherizing, but play around with it to get the look you're going for.


Here's the first section done:

Screenshot2010-10-04at110142PM.png


You may notice some strange distortions like this, as you go along:

Screenshot2010-10-04at110516PM.png


The best way to fix that is either to undo your last few filters and try a different selection, OR to go into Filter>Liquify

Screenshot2010-10-04at110521PM.png


Play with the pinch and bloat strokes to make things bigger or smaller, and the drag tool (The name of which escapes me at the moment) to realign the bricks as best as possible. This part takes a crapload of time, so have fun:

Screenshot2010-10-04at110600PM.png


Here is the quickie fix (Normally I spend much more time on this):

Screenshot2010-10-04at110620PM.png


Part 3, to come in about 1 minute...
 
Here you go, the third and final part of the my musculature tutorial:


Then, all that's left is to add a color layer under the muscle layer, set the muscle layer's overlay mode to "Multiply" tweak your opacities and such, and add more spherized sections and you're done!

Screenshot2010-10-04at111101PM.png


Finished [test] product:

Screenshot2010-10-04at111115PM.png


And here is a sample of what is possible with this exact technique:

Final.png


If you guys need anything cleared up, just let me know, and I'd be happy to help. I had to work this out through trial and error, so hopefully thanks to my errors you guys can enjoy the trials more.

I'll do my best to check in here from time to time for any questions that need answering, but hopefully if I forget to check in, SLW or S4F, can shoot me a quick PM over on the RPF to tell me to get my butt back over here.

Happy costuming!

-Nick
 
Nice work Nick. That's pretty much how I made my pattern, except I used CAD to draw the bricks to give the muscle def look. Took the better part of two months to get it done...drawing every verticle and horizontal line a few hours at a time.

RhinoBricks.jpg


But the results where worth it. Bricks over every part of the suit.

FrenchSpidey.jpg


Brad.
 
Brad, are they there any benefits to doing it in CAD as opposed to using a mask (like above) ?
 
Not really. Perhaps the brick warping is closer to the movie pattern in CAD, and you dont have a break in the pattern where the warping meets the un-warpped bricks..
Suitwarp.jpg

but in CAD you dont get the round edges on the bricks Nick has achieved. The bricks are more square in CAD. Really either method works fine, and both take a real lot of work to do. Nick's done a fine job.

Brad.
 
Thanks, Brad. I think you can actually get the round edges in CAD if you do them that way. My wife is an architect and she does round shapes as well as straight lines. Or am I missing something? Was that simply a style choice you made?
 
Oh you can draw pretty much any shape in CAD, but I basically drew horizontal and verticle lines. Placing a round edge on each joint would have been insanely time consuming. Unless there's a tool that does it.

Brad.
 
Ahh ok gotcha. I'm pretty sure that you can select a line or group of lines and copy and paste. So for example you would just have to make the rounded parts once...unless I'm not understanding something about your method. Just trying to wrap my head around it all.
 
Ahh ok gotcha. I'm pretty sure that you can select a line or group of lines and copy and paste. So for example you would just have to make the rounded parts once...unless I'm not understanding something about your method. Just trying to wrap my head around it all.
 
Yeah you can do an array of objects along a line but the distance and size of each box would be set, so when the bricks need to grow or shrink in size the array function just isnt suitable.
 
Hi Everyone,

Cracking forum on here :) I have been trying to gather the necessary components to create my own take on 2 spider-man costumes for the last year or so (Scarlet Spider and the Leo Zelinsky jacket version).

I live in England (UK) and been googling for urethane for the symbols but have so far turned up nothing :( any ideas what could be used as an alternative or where I might be able to get this in the U.K?

I wonder if you experienced and talented costume guru's might be able to advise how you create the cowl / mask? Thats the bit I have the most trouble with.

I made a very amateur Venom costume some time ago using a motorcycle balaclava thing and cutting out plastic kitchen sieves to the shape I wanted and fastening them with velcro (very bootleg lol)

5353475050_66fe153933.jpg


Many thanks for your dedication to supporting the noobs like me!

Bionic :)
 
I also want to note that the image being referenced of mine is actually a test I did in a few minutes. My actual pattern has no breaks in it. The bricks all flow perfectly, and anyone else who follows my technique can achieve the same, if you take your time.

That said, the original movie patterns were created in a CAD program by Sony Imageworks. (Their computer division) Both can give you pretty similar effects. It all depends where your expertise is...or at least where you're most comfortable.

-Nick
 
Here's a VERY in-depth explanation on how to make a spandex hood

http://www.stretchy.org/catsuit/extras/hoods/

Also...here's a video from the same people:
http://www.youtube.com/watch?v=GhJjprFR1VM

They also have videos on how to sew a catsuit:
http://www.youtube.com/watch?v=h6b-FBlTgc0

I'm diggin the Venom, BionicOwl. You get props for resourcefulness.

As for the urethane symbols, once in awhile you can find them on ebay...or people in this forum will sell them. Why not try my method that I posted up above? You can do it that way I bet. I'm betting Mc Master ships to golly old England :)
 
Anyone have any ideas on how to create the reboot suit?
 
Thanks StanLee Wannabe! :)

I spent ages last night searching through forums and other sites trying to understand how everyone does the cowl / hood / mask! I see most people use an undermask mold, then put the cowl on either gluing it on the undermask or leaving it lose and finally attaching the frames. My folder on my desktop called "Research" is growing exponentially lol

I will use an undermask but will be looking for an alternative method, just to figure out what methods I can try!

Thanks for the info on urethane as well! Is it called Urethane Foam in the shop? I might put an order in or look at alternative substances I can source in the UK, B & Q and Wickies here I come lol. Have you used any other substances like rubber, silcone, plastics etc?

If I can't find anything I may have to resort to using fun foam that is used for kids projects ;)

Spidey4Fun very kindly sent me the scarlet spider logo that he drew (thanks again btw!) and working on the hoodie for a comic con in london in April :) I have spraypainted it (see pic)

5362296820_af65c029bb.jpg


onto the hoodie but really want to use 3D symbols for good effect.

My ultimate project is to recreate the jacket from the Leo Zelinsky design, although at the moment I may end up sourcing a tailor to make the jacket for me!
 
You can get plain sheets of urethane (I just checked my link up there...it's not hitting to the right place...i'll fix that) ... then all you have to do is trace and cut! They even have red if you want to do the backside.

As for the new movie suit..I'd love to hear ideas about how to make THAT monster happen :)
 
Last edited:

Users who are viewing this thread

Back
Top
monitoring_string = "afb8e5d7348ab9e99f73cba908f10802"